What To Obsess Over Excellent article from Seth Godin asking the question about what we (businesses) obsess over. At WAi it's pretty simple. We obsess over pleasing our customers. Everything else is pretty clear after that.
Is Outsourcing Losing Its Appeal
Came across this interesting article from Tam Harbert writing for EBN - "Is Outsourcing Losing Its Appeal" Her thesis is basically that if companies like Google and Lenovo are looking at building their own products again, then maybe other large OEM's are looking into building their own products as well. It's well written and worth the read.
Obviously, WAi has a vested interest in companies outsources their manufacturing. I thought this might be a good opportunity to explain why we think outsourcing can be a good idea for many companies.
Primarily, it affords the company greater flexibility. They no longer have to concern themselves with questions like "Do we have enough employees to build as many products as we need?" or "Do we have too many employees and not enough sales to sustain them?". Not to mention the fact that since they build only their own products, they might not be exposed to greater manufacturing challenges that might push their skills to a higher level. Or, for many of our customers, they simply cannot afford the hundreds of thousands of dollars worth of equipment that would assemble the advanced circuitry that their engineers want to build.
When people think of outsourcing production, they often think of dirty, dark sweatshops in Asia where children slave away, tied to workbenches and rationed crumbs of bread to sustain them. This is not what outsourcing is like. Especially considering a lot of outsourcing is outsourced to domestic manufacturers like us. Outsourcing should be viewed more like a coop farm. In a coop farm, the farmer has more land and grows more food than he and his family can eat themselves. He really enjoys the farming process and taking care of his fields. He takes great pride in watching his crops grow and even greater pride knowing he's doing it without pesticides and artificial fertilizers. But then there's that pesky problem of too much food. So what does he do? He invites his neighbors to buy his extra food. Now his neighbors get to enjoy all of the benefits of fresh organic food, without all of the effort. They know the farmer well, they trust him and are happy to support him. They make requests of specific food items and this invigorates the farmer to try new farming techniques. You see where I'm going with this?
When you build your own products, you need to size your plant according to how much you're going to sell. Trouble is, you probably have little idea of how much you're going to sell. So sizing your plant properly is very difficult. Just like it would be a challenge for people trying to farm their own food. They're not quite sure how much to grow for themselves. Whereas if you outsource your manufacturing, your manufacturing partner can have a very large plant with lots of sophisticated equipment, because he shares that manufacturing capacity with many other OEM's. Those OEM's are greatful because they could never afford a machine sophisticated enough to place 0.3mm pitch micro BGA's. Just as a homeowner might struggle to grow an exotic plant that the farmer is probably already familiar with.
Let's take this analogy a little further. That farmer takes great pride in growing his crops without pesticides and artificial fertilizers. A good manufacturing partner has similar pride. He cares about his employees and does not want to expose them to harsh chemicals. He's going to make sure that he's given his employees the necessary tools to make sure they don't expose themselves to the harsh chemicals that are used in manufacturing. Additionally, when byproducts are produced, he'll make sure that hazardous materials are disposed of properly. As an example, WAi produces large amount of solder dross. This is solder that has been exposed to oxygen and is no longer useable. You can't just throw this stuff out, it could be very dangerous. So we've worked with a local company that comes by on a semi-annual basis, picks up our waste material, and then recycles or disposes of the material properly. This can be a lot to manage, but you as the OEM should never be exposed to this, because you've hired a reliable manufacturing partner that worries about those details for you.
Don't get me wrong. I understand there are other benefits to building your own products in house. But I wanted to take this opportunity to state that WAi firmly believes in outsourcing and takes great pride in delivering a quality product to their customers, just as a coop farmer takes great pride in bringing his neighbors fresh fruits and vegetables right to their door.
Manufacturing Can Be Beautiful
I firmly believe that manufacturing can be a beautiful form of art. Even as a child I remember watching how things like crayons were made and being absolutely mesmerized. This probably explains the phenomenon of the television show "How It's Made". Today I watched this video about how baseballs are made. One thing stood out to me more than anything else. Baseballs are mostly hand made. Unbelievable.
Don't lose your temper at work
Garbage man having a bad day Everybody has a bad day every now and then. But get some help. Don't do this.
Coffee
Here at WAi we like coffee. In fact a couple of us have a little tradition called "Fine Coffee Friday". Every Friday we rotate who will bring in their favorite coffee and we brew it for everybody to enjoy. Typically it's our favorite Starbucks blend. We keep it pretty simple. The coffee is ground for a drip coffee maker, we clean our coffee maker pretty well, then we just go ahead and brew what we brought. We drink it black. But some people can take it to a whole new level. Check out this review of Tonx Coffee. This guy is serious about his coffee.
Assembled in USA
Interesting piece of news from the NY Times. Looks like Google is attempting an experiment that I can't help but feel thrilled about. They're actually assembling their Nexus Q in the United States. I think it will be a success. Truth is, assembling the product in the US will cost them more initially. But it's likely that it will give them much greater flexibility and speed. Plus, they can just drive down the road and figure out any issues that might be happening. No waiting on "the slow boat" or paying hundreds of dollars to overnight packages. There are major benefits to assembling your product close by where you design the product. This inspired us here. So just 10 minutes ago we ordered 1,000 "Assembled in USA" stickers. These will go on every one of the packages we ship out. Hopefully it will inspire our customers too.
Link: Built To Not Last
Built To Not Last I really enjoyed this article by Kyle Baxter.
This was a rebuttle to the argument made by some that insist that technology products should last a decade, and faults manufacturers for not building products that will last that long. But Kyle makes the point that that sounds more like dystopia rather than utopia. It's a short read but wonderful. I especially liked his last paragraph.
I don’t think purchasing a new tablet every couple years is a concern. I do think, though, that purchasing a new one without rationally considering why is. To benefit from new technology, we have to cooly think through its use and how it will improve our lives. Otherwise, it’s just another gizmo that does little tricks and is put away in the closet after it stops amusing us. And otherwise, technology is something that isn’t used for the betterment of our lives. Technology is not inherently good. It’s amoral. How we use it defines whether it’s good or not.
Manufacturing Apple Products in the US
The WSJ had a short article the other day regarding Apple manufacturing parts for their products in the US. Truth is Apple makes quite a bit for their products in the states, including the processors and the glass that covers the front of all of their iOS devices. (and the back of the iPhone) They point out that one of the biggest problems with manufacturing their products in the US is that their just aren't enough manufacturing engineers.
I don't totally buy this as a reason, and I don't necessarily think Apple believes it either. They don't need an army of engineers to help them manufacture their products here, just a handful. They're Apple, they could find the best engineers in the country, and many of them would come out of the woodworks to be a part of that.
The bigger issue is that the assembly of their products is just incredibly labor intensive. Their finally assembly for the iPhone has somewhere in the range of 100+ screws. Those don't get inserted by machine. And believe me, you cannot pay American wages for that kind of manual assembly, for 30-40 million devices a quarter.
But sub assemblies on the other hand, this is where American can knock it out of the park. In addition to the processors, American companies could be making the flash memory, the circuit boards, the circuit board assembly, all of these various sub assemblies that are heavily automated. I know Apple is proud to be an American company. The late Steve Jobs even said so during their "Antennagate" press conference. I think it's very likely that Apple is looking to find ways to produce more of their sub assemblies here. I hope they look at WAi for help! (I'm not holding my breath)
Slight of Hand
CBS News: Bringing Manufacturing Jobs Back
http://www.cbsnews.com/video/watch/?id=7406166n Nice short clip regarding Buck Knives and their need to return their manufacturing operations back to the US. Their customers we upset that they no longer manufactured in the United States. But on top of that, the cost to manufacture overseas was just too expensive compared to domestic manufacturing. Looks like companies like GE and Caterpillar are joining in as well.
Selective Soldering Tips: Drag Off Angle
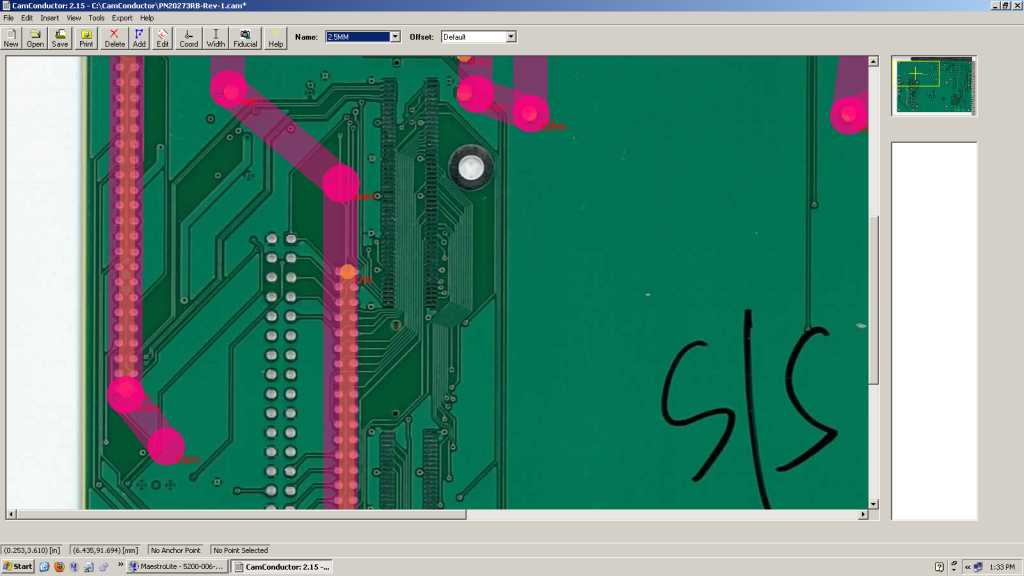
This is just one article in a series of articles discussing tips and tricks for using a selective soldering machine. Here at Worthington Assembly Inc. we have a selective soldering machine manufactured by RPS Automation. Our particular model is a 2010 Rhythm model. These article are written by the same person who's used this machine every day for over a year. When soldering a double row header, or similar part, the solder can easily bridge at the end where the solder nozzle comes off. I don't know the technical term for this but I call it the drag off. There are multiple arguments for the way you can drag off the end of the double row header. The most common recommendation is to drag off at a 45 degree angle.
I don't necessarily agree with this. I found greater success dragging off parallel with the double row (in other words, straight). The key here is the speed you drag off at. The slower the better. (You can go too slow though, so be careful. If you go too slow you'll melt the header you're soldering.) More importantly, you need to use that same speed across the entire header. The trouble is, when the nozzle changes speeds or angles, it stutters. Not much though. It's almost imperceptible but if you look closely you'll see it. I don't know that this is necessarily what causes the bridging but I suspect it is. So what we do more often than not is to drag straight off the double row headers at 0.200" per second.
Now after explaining all of that, I must point this out. Sometimes it is still necessary to drag off at a 45 degree angle. Take a look at the above picture. You'll see 2 double row headers. The one on the left we drag off at a 45 degree angle. The one on the right we drag off straight.
You'll notice that on the double row header where we drag off at a 45 degree angle, the pivot point is right at the last 2 pins, while still barely touching the previous 2 pins. What's happening here, as best I can understand, is that we change all of the surface tension of the solder wave. We now have 4 pins all tugging at the solder as it's dragging off. This causes the solder to want to adhere just to the pins and not to fall back onto itself. That having been said, I've still had better success dragging off at a straight angle, without "stutter stepping" on the last four pins.
To sum up, try dragging off at a straight angle, making sure to go nice and slow over the whole double row header. We find 0.200" per second works best. If you get inconsistent results with that technique try dragging off at a 45 degree angle, making sure your pivot point is adhering to the last 4 pins to use them as tension against the solder bridging itself.
As always, if you have any questions, feel free to give me a call or send me an email.
Selective Soldering Tips: Dwelling for Better Hole Fill
This is just one article in a series of articles discussing tips and tricks for using a selective soldering machine. Here at Worthington Assembly Inc. we have a selective soldering machine manufactured by RPS Automation. Our particular model is a 2010 Rhythm model. These article are written by the same person who's used this machine every day for over a year. Some of the parts our customers ask us to solder can absorb a lot of heat. And I mean a LOT of heat. One particular part that we solder has 16 solder joints, is made completely of metal (not sure what but it seems like a tinned copper), and nearly every pin sits on an enormous ground plane. Not to mention, the holes are by no means oversized to make this any easier. Needless to say, it gave us some trouble.
We tried using a local spot preheat. This helped a little but at the end of the day, that solder still did not want to flow up through that ground plane. So we thought, why not just sit there with the nozzle. Turns out, that was the trick.
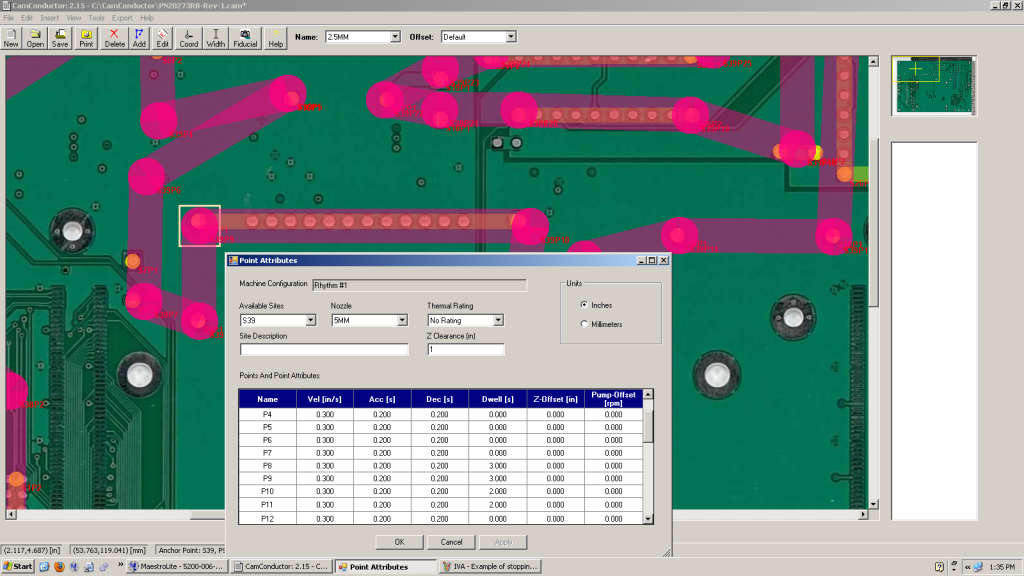
It's fairly simple really. Using RPS's software we just added an extra point at the four pins that absorbed the most heat. Then we just add a couple seconds of dwell at each point.
Click here for the full size image
This worked like a charm. You can actually watch from the top of the machine as the solder climbs up the joint. It happens slowly, but once it makes it all the way through you can see a beautiful solder joint remains.
Dwelling on specific points will add to your cycle time obviously. But in an effort to make the best product possible, it's a small price to pay.
As always, if you have any questions, feel free to give me a call or send me an email.
Selective Soldering Tips: Using the Machine for Preheat
This is just one article in a series of articles discussing tips and tricks for using a selective soldering machine. Here at Worthington Assembly Inc. we have a selective soldering machine manufactured by RPS Automation. Our particular model is a 2010 Rhythm model. These article are written by the same person who's used this machine every day for over a year. Heat helps. Anytime you're soldering anything, the more heat the better. Even when soldering board by hand with a soldering iron, having the board a little warm before you start can help a lot, especially for boards with large ground planes.
One of the boards we run quite often here has just a couple of small connectors. It's a lead-free board but it was a real challenge to get it to solder consistently without bridging. We couldn't figure out what the issue was but after some experimentation, we discovered that heating the specific area we were about to solder helps for just a few seconds made all the difference.
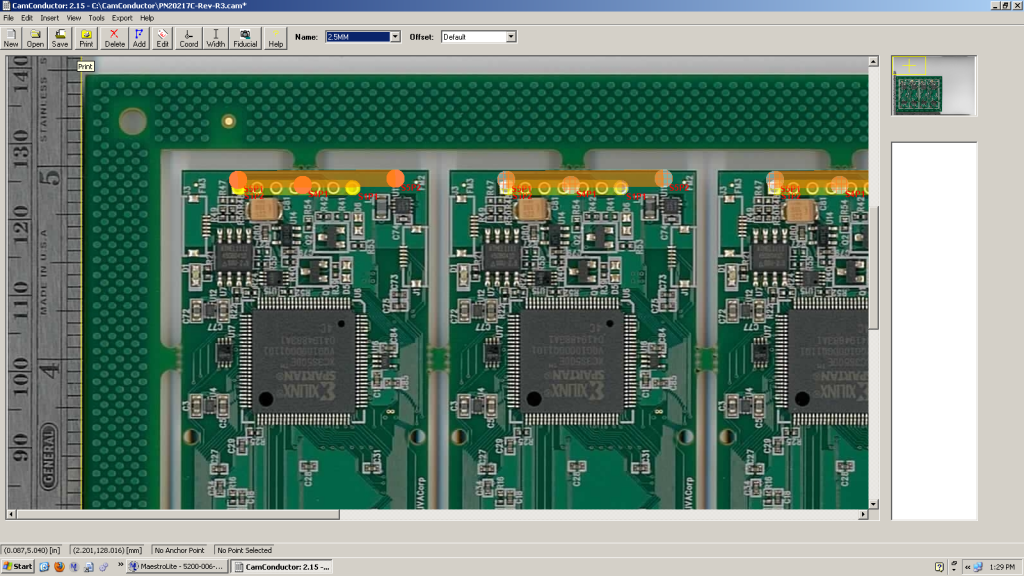
As you can see in the image below, there is a small dot of orange in the middle of where we drag solder across the connector.
Click here for the full size image
When we program the machine, we edit that specific point to dwell for about 3 seconds. We also add a negative z offset of about 5mm. What will happen is the machine will drive to that specific location, raise the nozzle as if about to solder there, but then never come into contact with the board. Heat will just pour out of the nozzle and the nitrogen shroud and get what whole area nice and warm. Right after that we just go ahead and drag solder across the connector and it comes out beautiful every single time. Since we've implemented this one change to this assembly, we have never had a single bridge. Ever.
Preheating is always helpful. We recommend using a hot air preheater before you even put the board inside the machine. But these are rather pricey
As always, if you have any questions, feel free to give me a call or send me an email.
Selective Soldering Tips: Overlapping
This is just one article in a series of articles discussing tips and tricks for using a selective soldering machine. Here at Worthington Assembly Inc. we have a selective soldering machine manufactured by RPS Automation. Our particular model is a 2010 Rhythm model. These article are written by the same person who's used this machine every day for over a year. We do not own a wave soldering machine. We've never had a need for one. Most every circuit board we build has double sided surface mount and thru-hole, making wave soldering a non option. But sometimes we get circuit boards that are designed for wave soldering, so we have a technique for handling those.
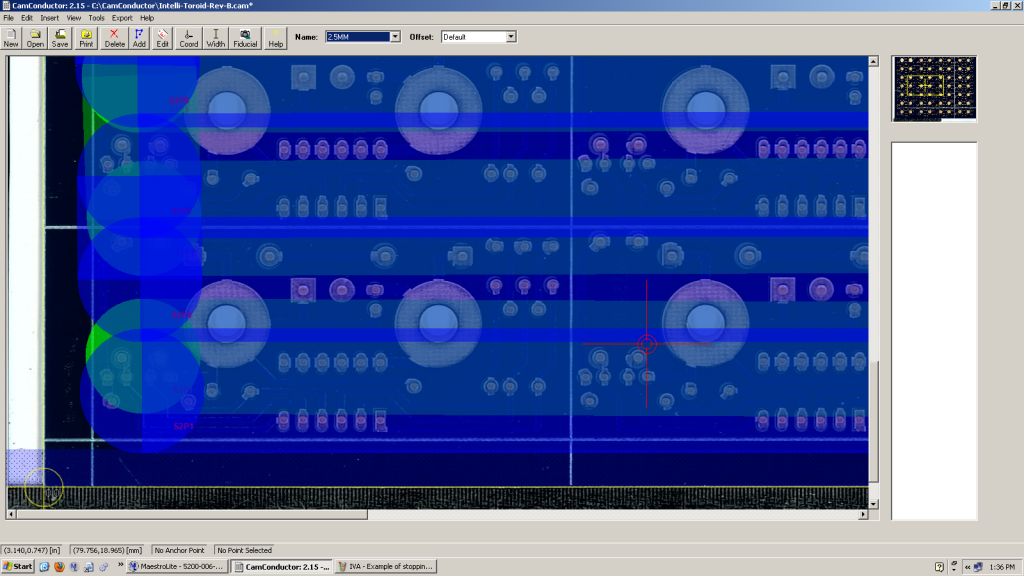
We use our largest nozzle, which has an inner diameter of 8mm and an outer diameter of about 21mm. When we write our program, we overlap the path the nozzle will travel as seen in the image below.
Click here for full size image
The reason we do this is because if we merely grazed the edge of the path we might get missed solder joints. This happens because the contact area, where the solder meets the circuit board, is not always consistent. It's affected by a number of things including your pump speed, the amount of solder in your solder pot, the flex in the board, etc (when a board is closer to the nozzle, the contact area gets much larger. Even a few tenths of a millimeter can make a big difference). Overlapping the nozzle enables us to be more flexible. We don't have to keep such a close eye on the pump speed, or the solder level. And as our board heats up and bows, we don't have to worry about whether or not it's going to touch every solder point we need it to.
Overlapping doesn't have to be used only when substituting for a wave soldering machine. It can be used for a number of different applications. Be careful though because sometimes overlapping on areas where pads are too close or leads are too long can cause bridging.
We hope this helps. Please feel free to give me a call or send me an email.
2011 In Review: SMT Line
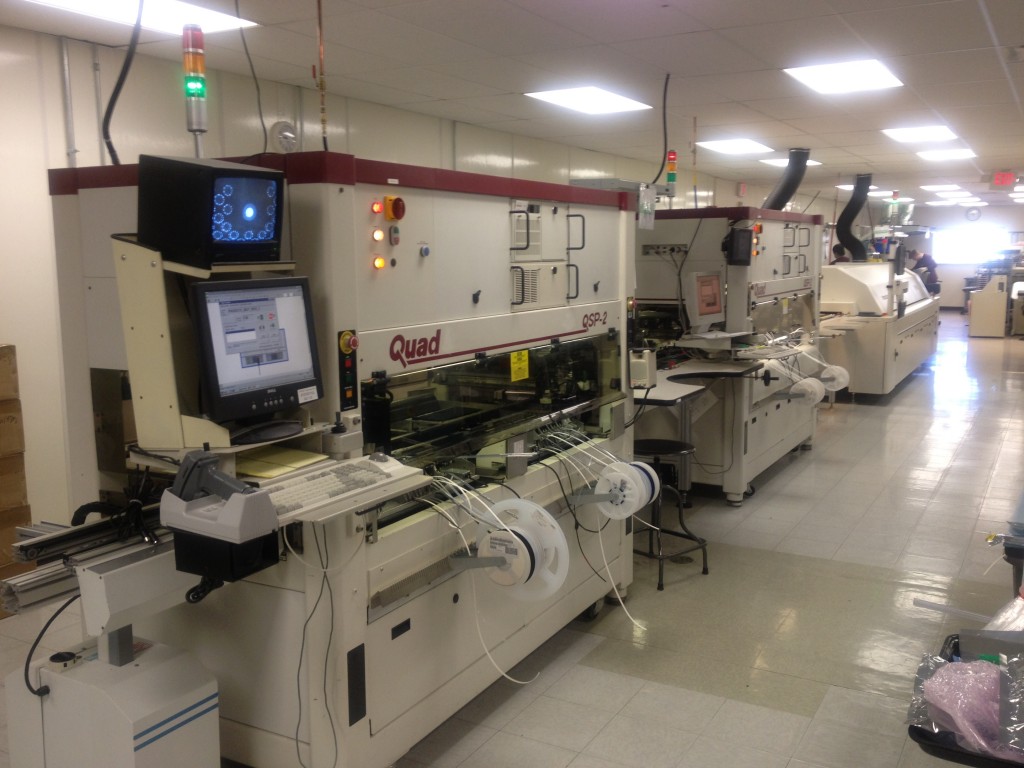
When Worthington Assembly started assembling circuit boards 30+ years ago, the smallest component was an 1/8th watt thru-hole resistor. Surface mount parts were just being invented somewhere in an IBM research lab in upstate New York. Fast forward a few decades and Worthington Assembly finds itself with two high speed pick and place machines that are placing components as small as the sand on the beach. The biggest focus we had a couple years ago was just making sure these machines ran properly and good product came out. Material handling was hardly an issue when you were processing boards once every eight minutes. But times change, and businesses change. Worthington Assembly certainly did. We went from processing a few hundred boards per week, at most, to a few hundred boards per day, regularly. So material handling became a great issue. Especially when your pick and place machine decides it doesn't feel like paying attention to the light sensor that tells the conveyor to stop. Nah, just let that board fall on the floor. (Editor's Note: Don't worry. We never ship something like that. We just had to deal with it)
We started simple. We simply put a conveyor on each end of our most used pick and place machine. It made it simple for the operator to place a circuit board on the in feed conveyor and simply pickup the circuit board from the out feed conveyor. This worked, for the most part. But at the end of the day it was still a very manual process. After looking around for a while we found a couple more conveyors that could really make this work. Or so we thought.
So one day we decide "Ok, we have all of the equipment we need. Let's put all of these machines in one nice assembly line." So here we are with pallet jacks, wrenches, hammers, 2x4's, the whole nine yards, moving and shuffling everything around. We placed our first pick and place machine where we wanted it and then put a conveyor on either end of it. Then we placed our second pick and place machine behind the in feed conveyor of our first pick and place machine. Only one problem. This sucker is heavy. I mean thousands of pounds heavy. And since it wasn't sitting quite straight, we had to wedge this machine in place. It literally took hours but we got it where we needed it. We just slapped on its own in feed conveyor and then gave it a shot. This is where the "Or so we thought" comes into the picture. Our pick and place machines were wired wrong. Their SMEMA cables (SMEMA is the communication standard for all circuit board assembly lines) had been manually changed by a previous owner. After much time and effort we finally figured out what was wrong and switched the wiring back to standard SMEMA wiring. All's well right? Wrong.
Turns out one of the conveyors were purchased second hand, was not working. At all. It would turn on and you could see that it had power, but none of the motors would ever spin. We looked at the PLC and saw that it had a "fault" LED lit up. After some web searches we found this is a common problem for this specific PLC. We decided that must be the problem so we went ahead and ordered a new one. We peeled the program off of the old PLC and tried loading it on the new one. Same problem. Nothing happening. At this point we decided to contact tech support for this conveyor manufacturer, who happens to be Simplimatic.
We here at Worthington Assembly cannot say enough good things about these guys. They absolutely went out of their way to help us out. They went above and beyond to find all of the drawings they could and all of the software that was originally loaded on the PLC. Keep in mind this is a completely discontinued machine that we bought second hand. Simplimatic never received or even asked for a dime from us. Ultimately, we still weren't getting far though. But it wasn't Simplimatic's fault. We simply could not understand what the problem was.
Then one day a guy walks in our building, looking for extra work. He tells us that he works for a guy who designs control systems. You would hire this guy if you were a sewer plant and you needed somebody to develop a system to help you control all of the valves and heaters and motors that made your plant work. This is some pretty complicated stuff. All we needed was somebody to make a couple motors start spinning on a conveyor. So we asked him to give us a quote, half expecting never to hear from him again.
Then one day we get an email. His guy is interested. Even better, he's just looking for a lunch. He appreciates a small local manufacturing company and wants us to keep him in mind for any future projects that we might be able to use his help on. So we have him in and after a few minutes, he's got this thing working perfectly. Turns out he did exactly what Simplimatic had been trying to tell me the whole time. "Have you tried to just change the fault code from 1 to 0?" Sure enough, that's all it took. Finally our SMT line was complete.
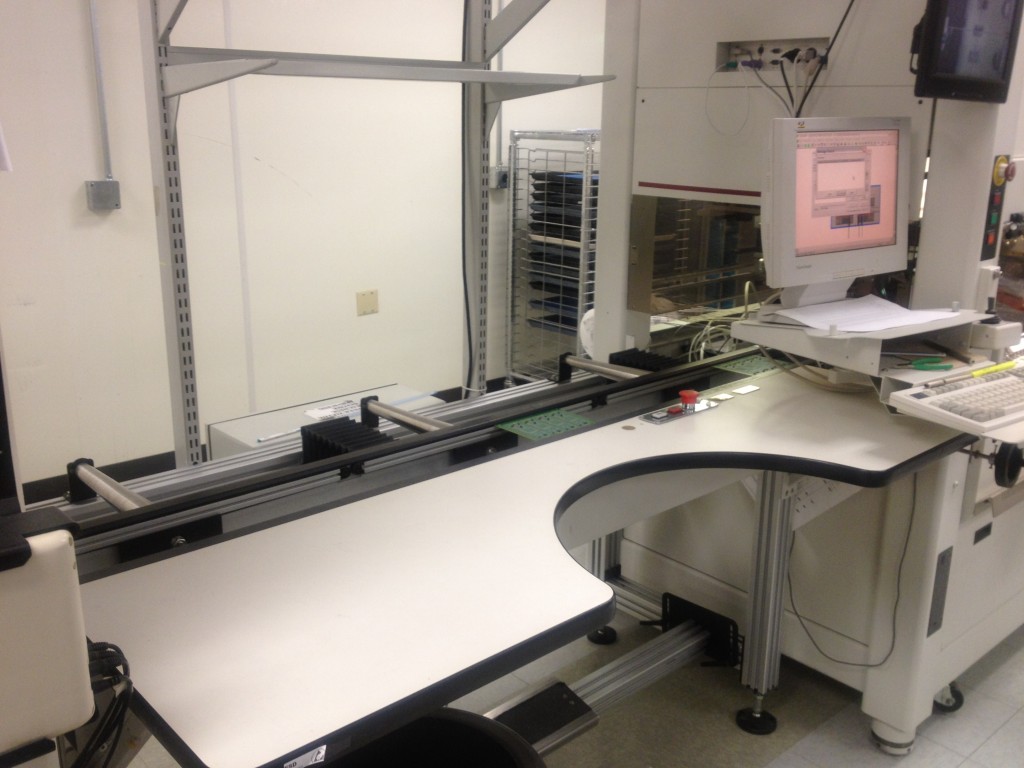
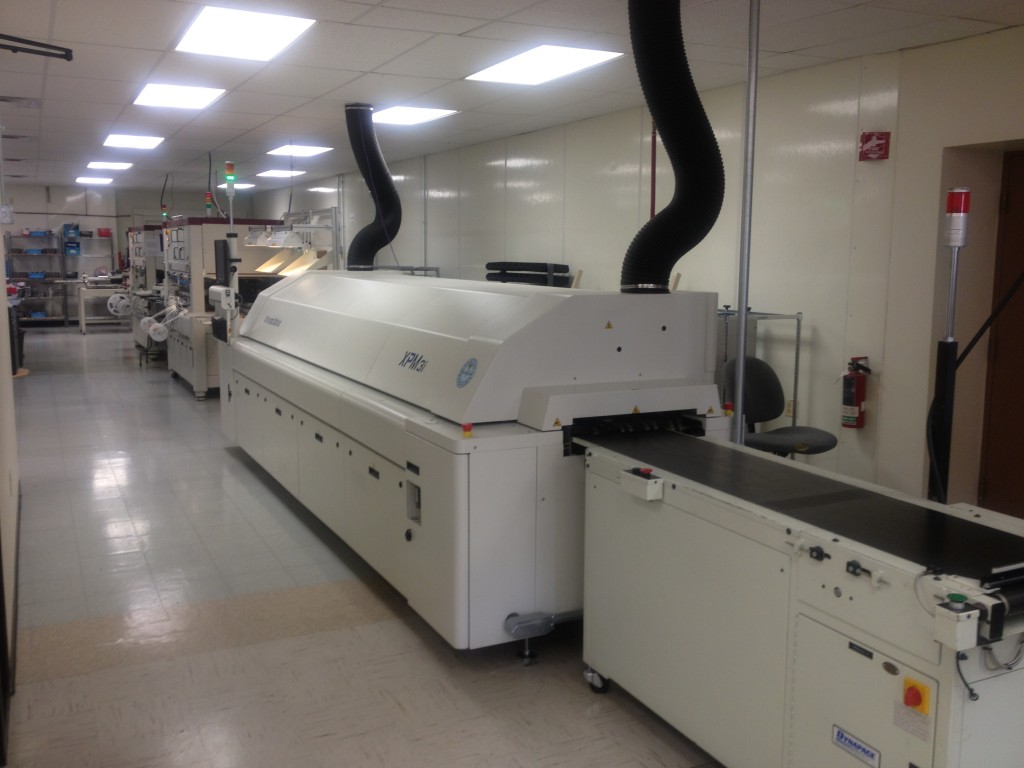
Today, we have a fully functional reliable SMT assembly line. You can view the video below or I can try my best to paint a word picture for you. First you have the printing process. This is where we apply the solder paste to the bare circuit board. From there you place the circuit board on the first SMT conveyor.
This is a small 18" long conveyor that holds the board until the pick and place machine is ready for it. Once it is, the conveyor will feed the board into the machine, so the operator can then place the next circuit board on the conveyor and wait until the machine finishes the one it has and asks for the next one.
The first pick and place machine only assembles half of the circuit board. From there he spits it out onto a 3 zone inspection conveyor.
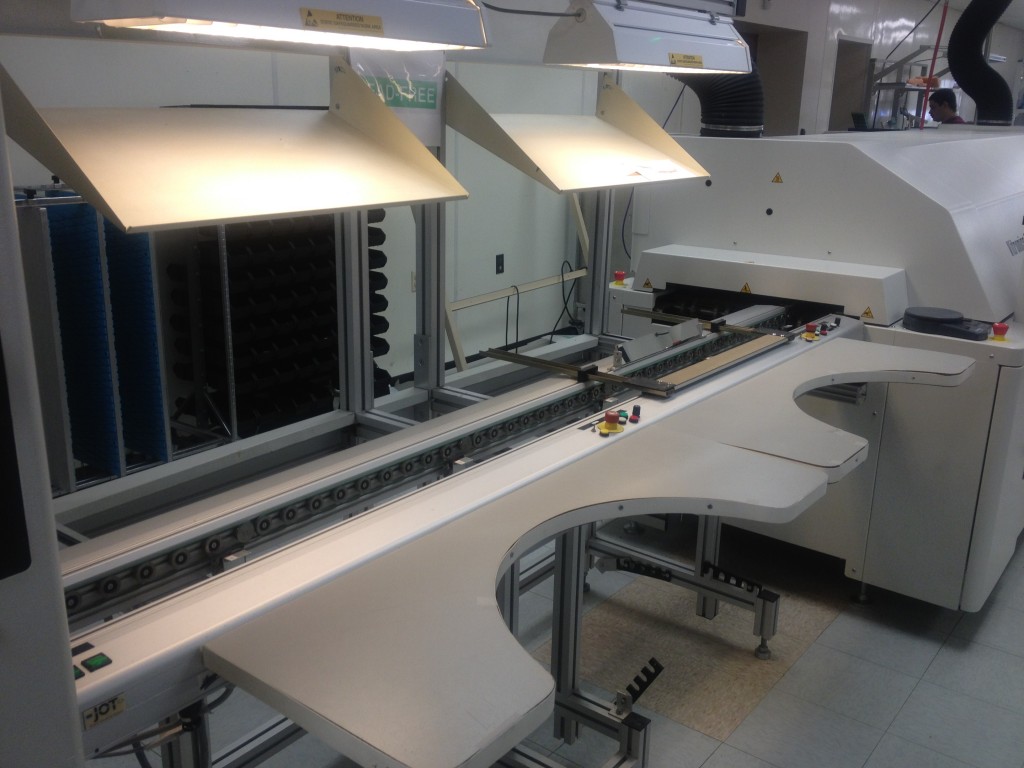
This conveyor has a small cutout where and operator can get in close to see the circuit board and make sure there are no issues with it. The conveyor has 3 zones which allows it to hold 3 circuit boards while it waits for the second pick and place machine to ask for one. This gives our assembly line elasticity. As one machine might be faster than the other, it will queue up boards for the next one. But sometimes the next pick and place machine ends up being faster because the first pick and place machine has exhausted a part and needs to have it replaced. This means the second pick and place machine can continue to run, using the 3 boards that are queued up for it.
So once the second pick and place machine finishes the second half of the circuit board, it goes onto a third conveyor that has 5 zones and two inspection stations.
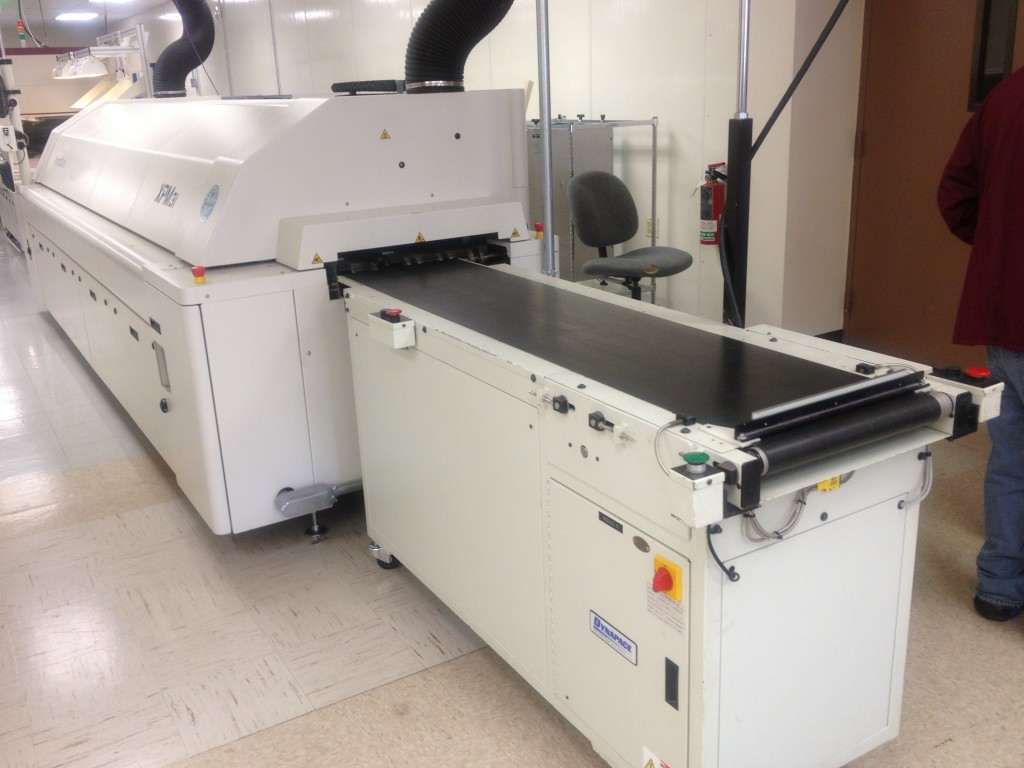
The first inspection station is often used to place larger or odd shaped components by hand. From there the operator will press a small button that sends the board to the next inspection station where somebody can look at each placement before pressing another small button to send it into the reflow oven. After the reflow oven we have a large, wide, flat belt conveyor. This conveyor looks a lot like the conveyor they use at your local grocery store.
Boards drop gracefully at a small angle onto this conveyor and travel about 48", allowing sufficient time for the operator to now grab the completed board and put it into the AOI to continue our process.
This all makes perfect sense right? Well you would be surprised at how few contract manufacturers do this. Most of them are doing exactly what we were 12 months ago. Carry each board by hand from machine to machine. Not only is this time consuming but it's also dangerous. Boards can be dropped, and they often are. Now even if a manufacturer happens to get his pick and place line running well, they often miss what we consider the most crucial step. That of catching the board from the reflow oven. For whatever reason most people rely on an operator standing at the end of the oven to catch each individual circuit board. Talk about time consuming. Not to mention dangerous. What if that operator gets distracted or forgets he's supposed to be there. I cannot tell you how many times I've visited manufacturers and have witnessed this happened. I've literally seen dozens of circuit boards land on the floor, only to be picked up by a worker and placed into a rack, hoping nobody noticed. It sickens me. Worthington Assembly is determined to be better than that. We are a detail oriented company and we are not going to let things like that fly here.
Worthington Assembly's SMT line is now complete. And we are prepared for a much greater volume of assemblies than we ever have been in the past. So if you've ever talked to us before about your assembly and we simply could not afford to build it at the price you were hoping for, talk to us again. We're a very different company in 2012 than we even were in 2011.
2011 In Review: Reflow Oven
During the SMT process, a thin layer of solder paste is "printed' onto the circuit board using a stencil. The stencil allows us to apply a very precise amount of solder paste on the circuit board, exactly where we need it. Components are then placed onto the circuit board, on top of the solder paste. But once the components are in place, you still need to solder all of them. That's where the reflow oven comes in. WAi has a long history with reflow ovens. Like most contract manufacturers it all started with a toaster oven. Yes. Literally a toaster oven. Place the circuit board inside, close the door, set the timer, and come back. This, believe it or not, worked fairly well for very simple assemblies. But it obviously has its problems. So next came along this guy...
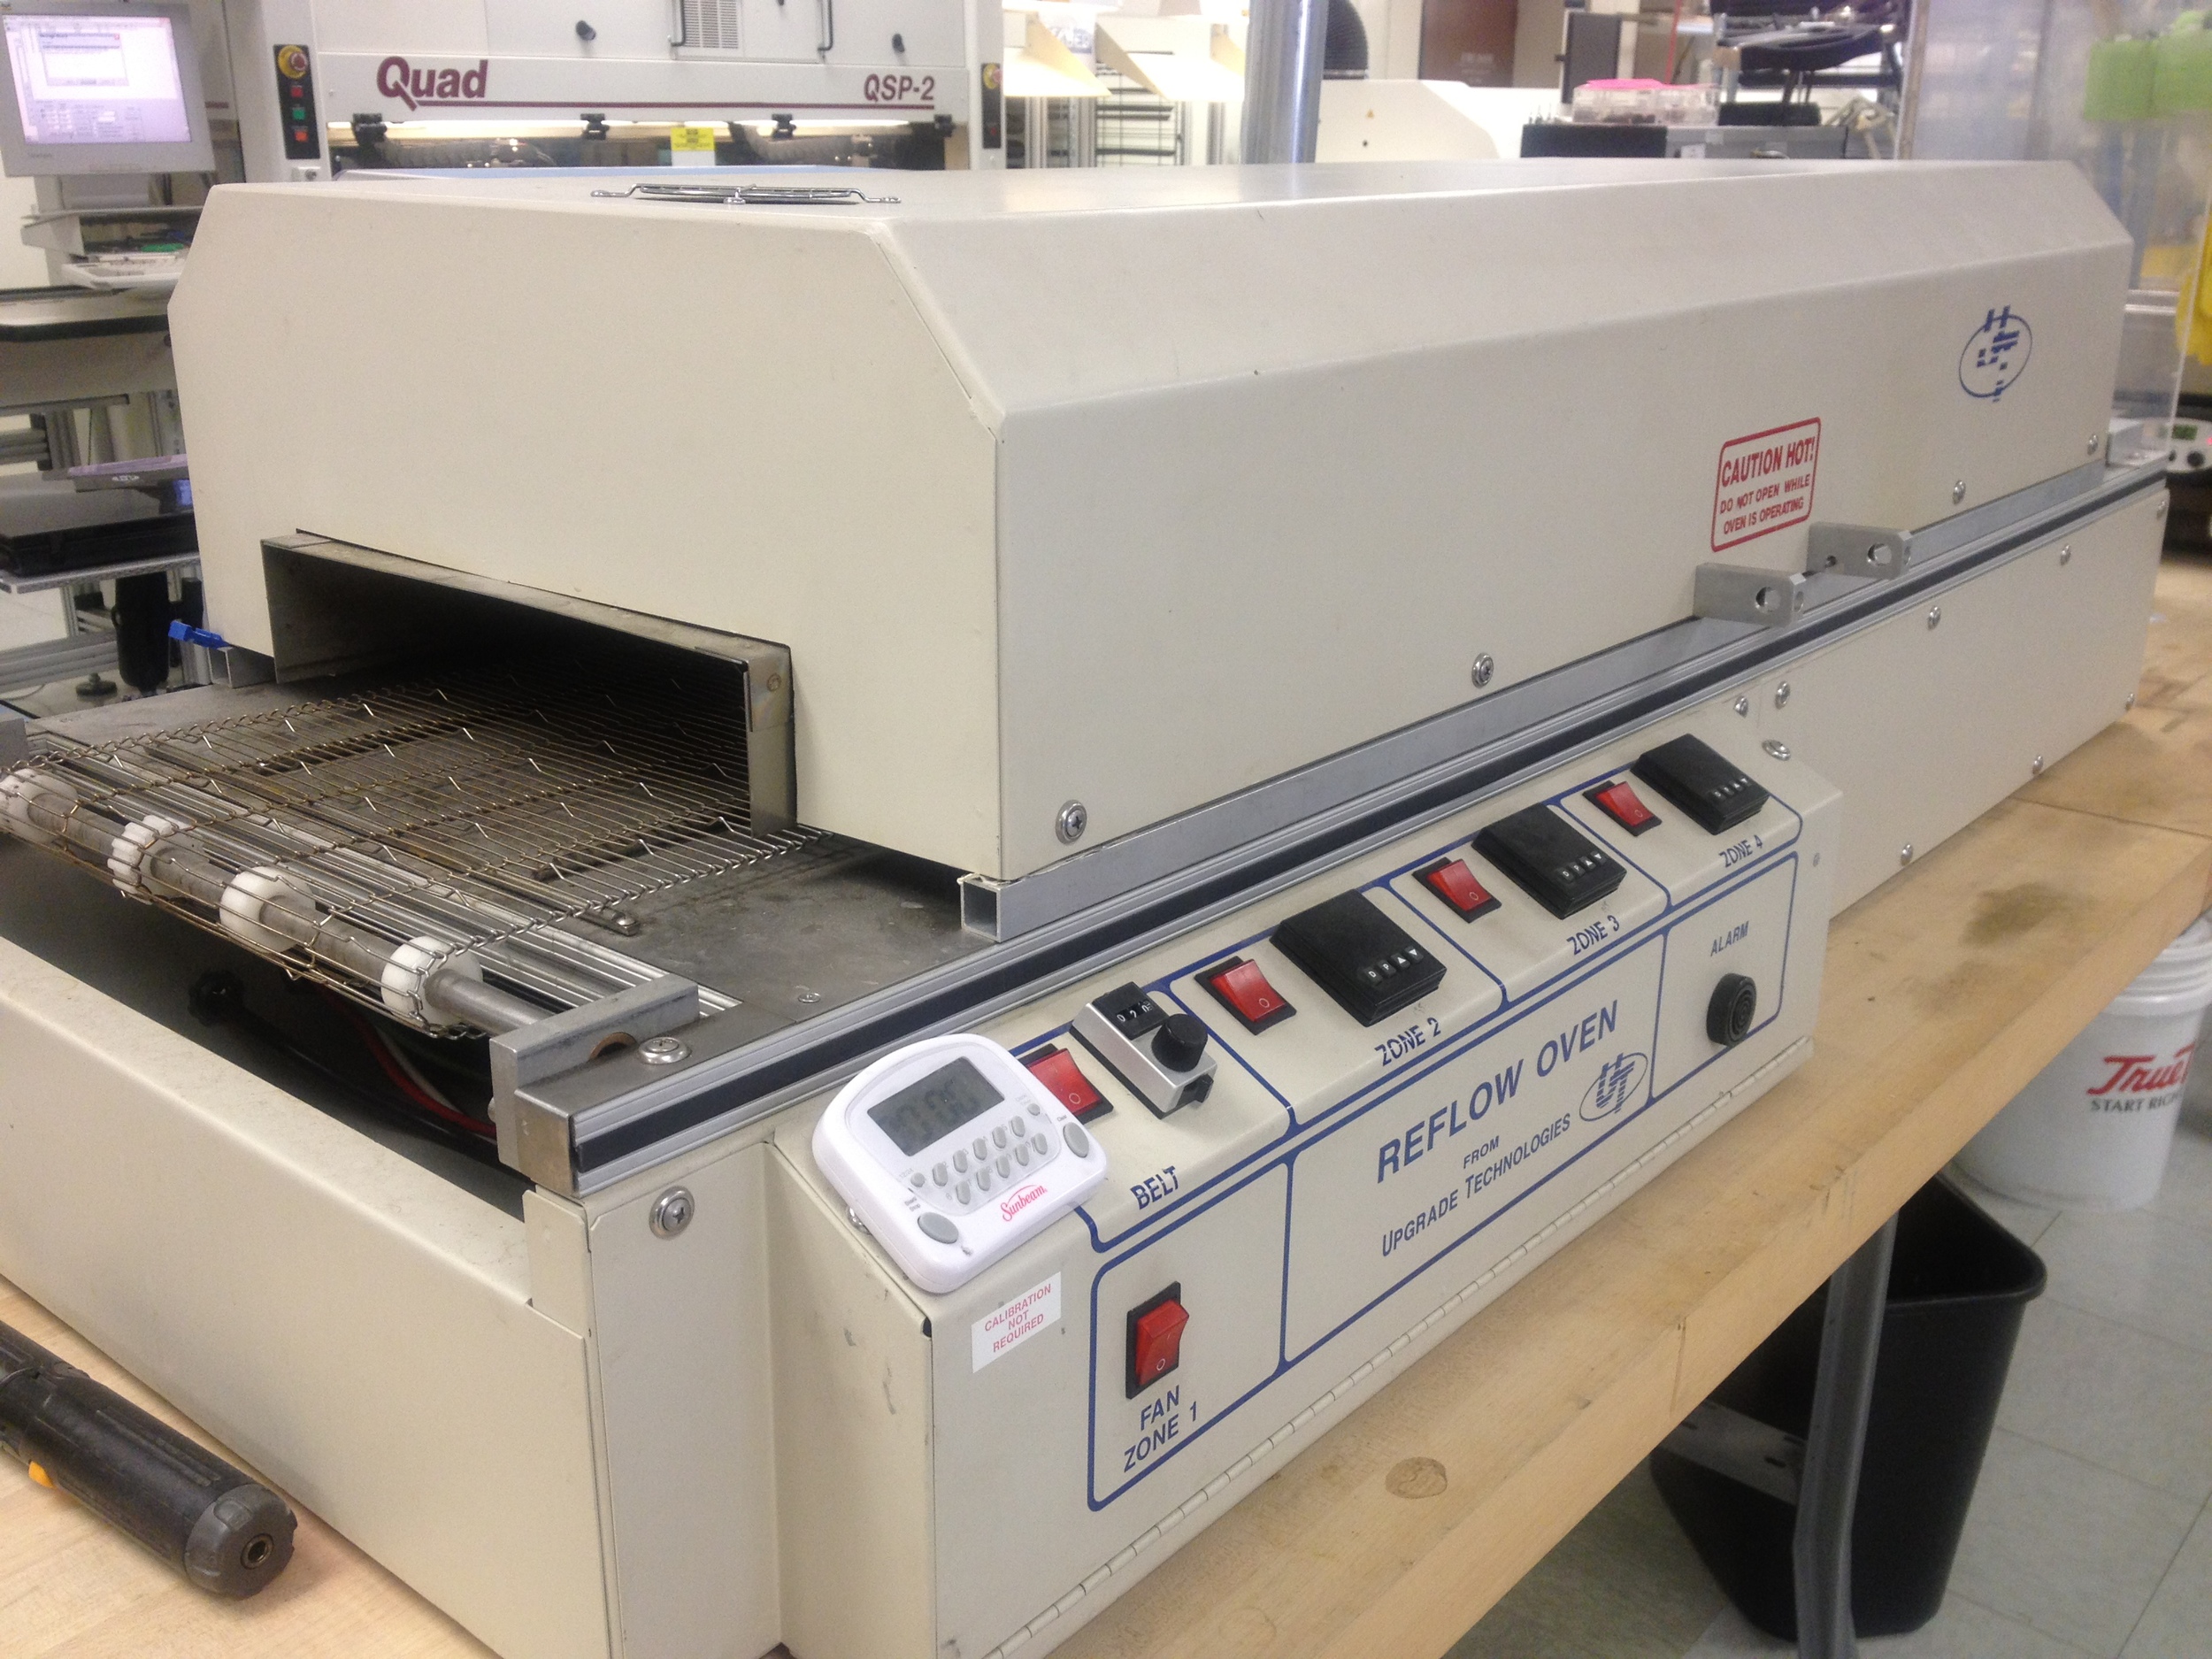
This style of oven is called a "bench top reflow oven". As its name implies, it sits on a bench. You can plug it into single phase 220VAC and you can reflow the solder paste on circuit boards. The trouble with this reflow oven is that it cannot hold its temperature very well. Once you start to load up the oven with circuit boards, those circuit boards act like ice cubes in hot soup. The temperature inside the reflow oven wants to drop dramatically and the oven does not have the horse power to maintain its temperature. What would result were inconsistent reflow and on some occasions having to run circuit boards through the oven more than once.
It was obvious to WAi that we needed something better. Especially as the complexity of the circuit boards we were building kept increasing and this old style of reflow oven had no capability to run what's known as a "double sided" circuit board. (Basically, there are surface mount components on the top and the bottom of the circuit board. You process one side at a time. When you reflow the second side of the circuit board, all of the components on the bottom must hang freely in the air, allowing the surface tension of the solder to hold them in place)
But WAi had another problem. They were located in the small, lovely, town of Worthington, MA. It's a beautiful town in the Berkshire Mountains but there is little convenience for a manufacturer. There is no 3 phase power, UPS only comes once a day for delivery and pickup, and the fastest internet you're going to find, even today, is probably 56k. After a long a hard search, WAi found this guy, affectionately known as "R2D2".
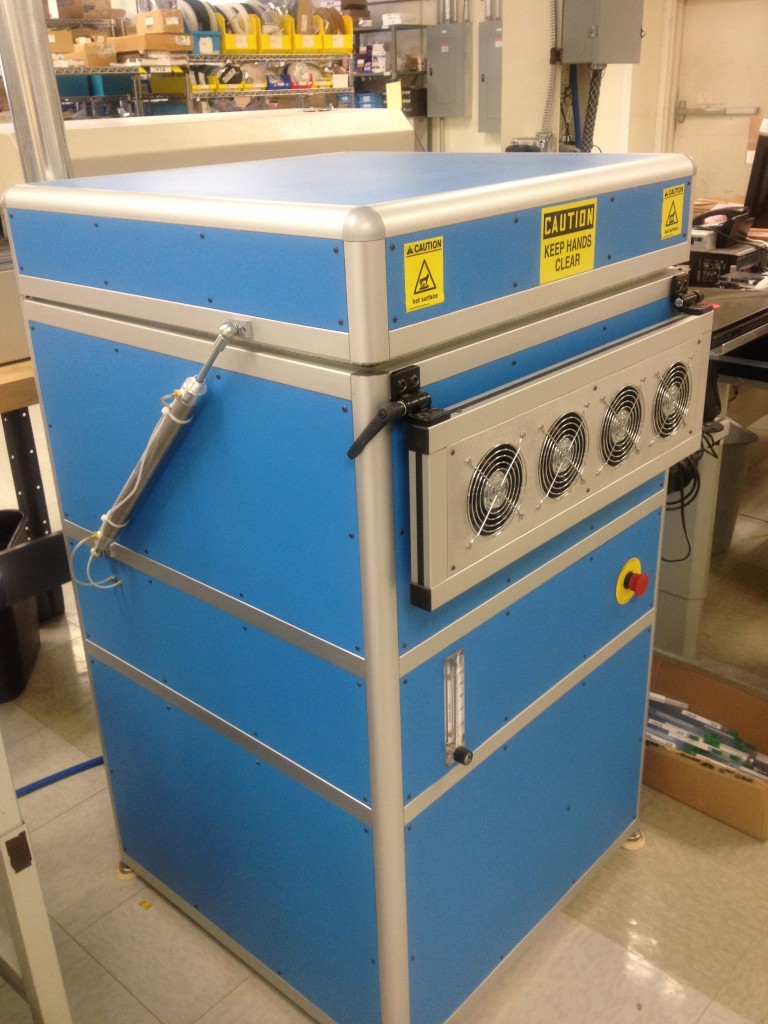
While it might not look like much, this is actually a very capable, machine. It served us well for a long time. But as we were growing, it just could not keep up with the demands we were placing on it. It could perform one reflow cycle every 8 minutes or so. So the speed we could process boards was largely dependent on how many boards we could fit into the chamber. Smaller boards would obviously be faster, but sometimes we'd build very large boards that took very little time to run through our pick and place machines and then they'd be sitting around waiting to be put into the reflow oven.
Ultimately, towards the end of using this machine, it started to give us some real headaches. Many of the joints were not reflowing properly and we were spending too much time soldering many of our products by hand. Enough was enough. We needed a real reflow oven. Thankfully, WAi had moved into a new facility that offered a full compliment of power choices. Including our beloved 3 phase 480VAC. So we picked up this guy.
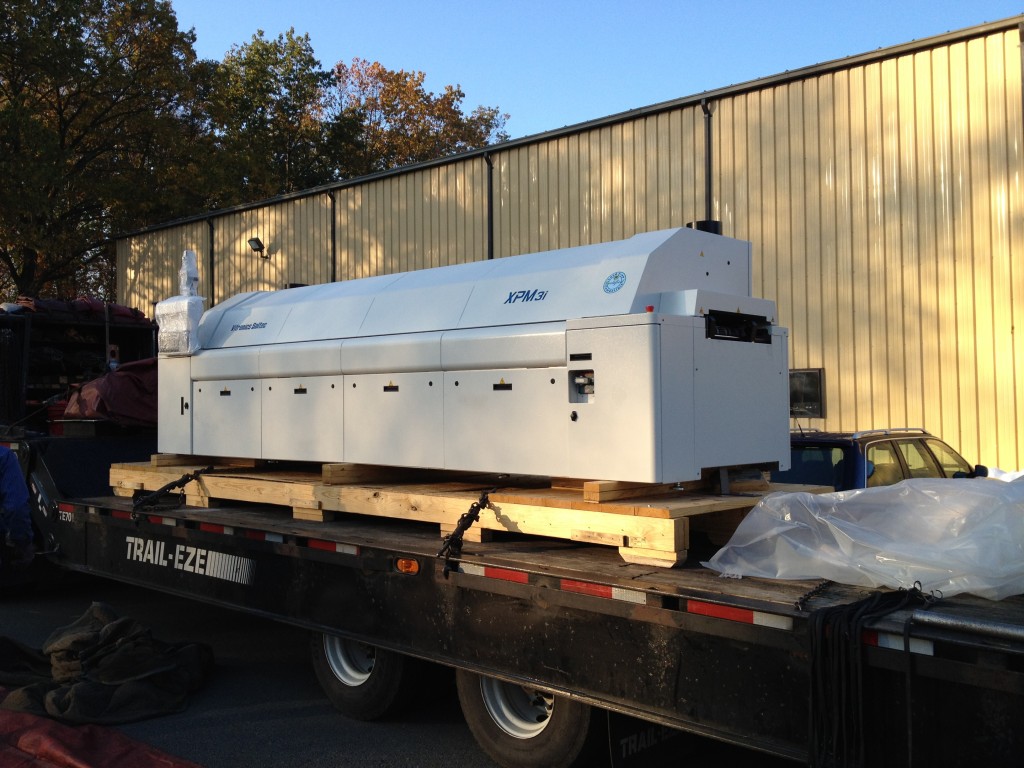
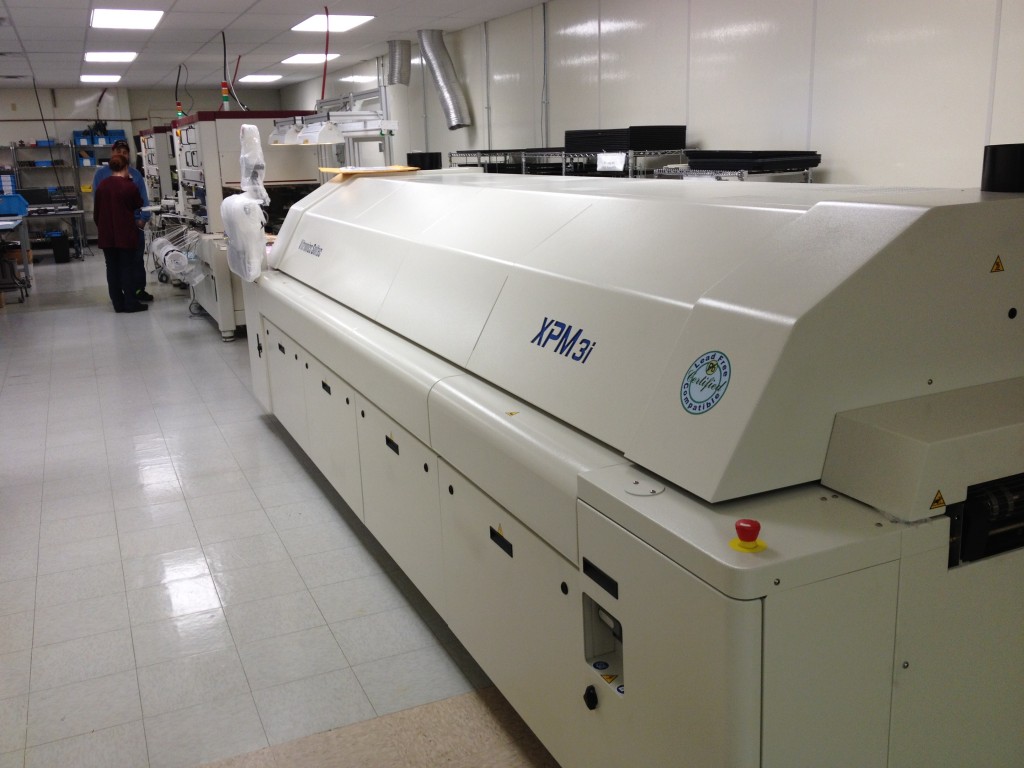
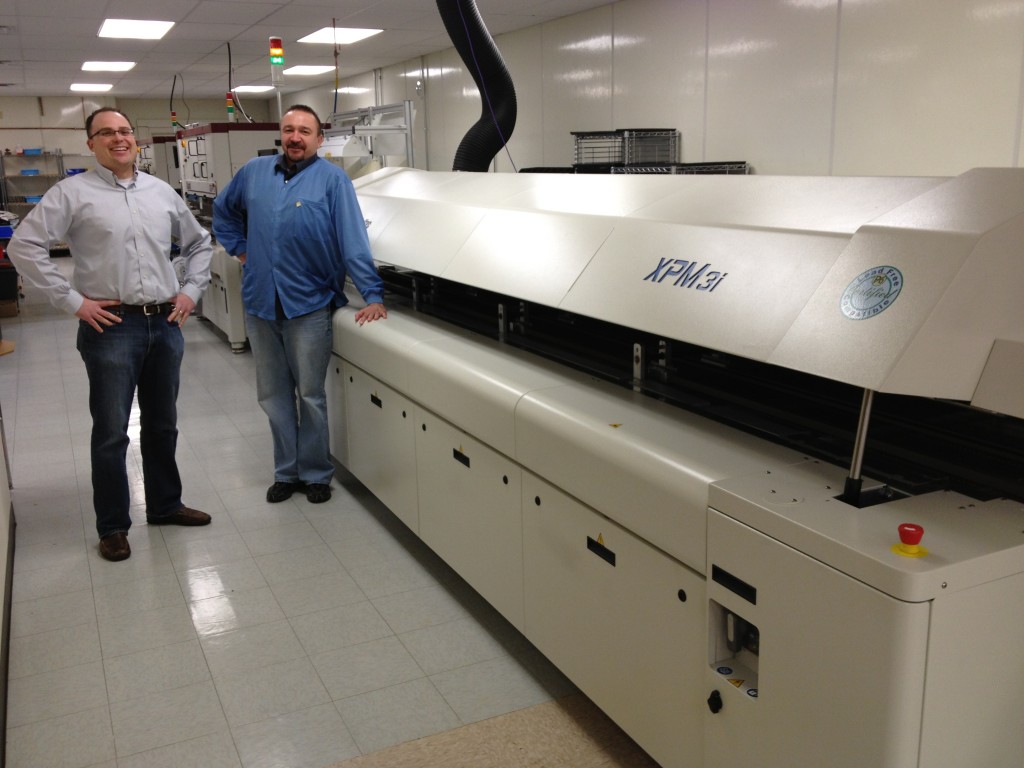
Enter the Vitronics Soltec XPM3 820. This picture was taken the day it arrived. This reflow oven is about 16 feet long by 4 feet wide. It can reflow any type of circuit board you can imagine. Thick - Thin - Leaded - Lead-Free - Double Sided, there's nothing we could not process with this machine.
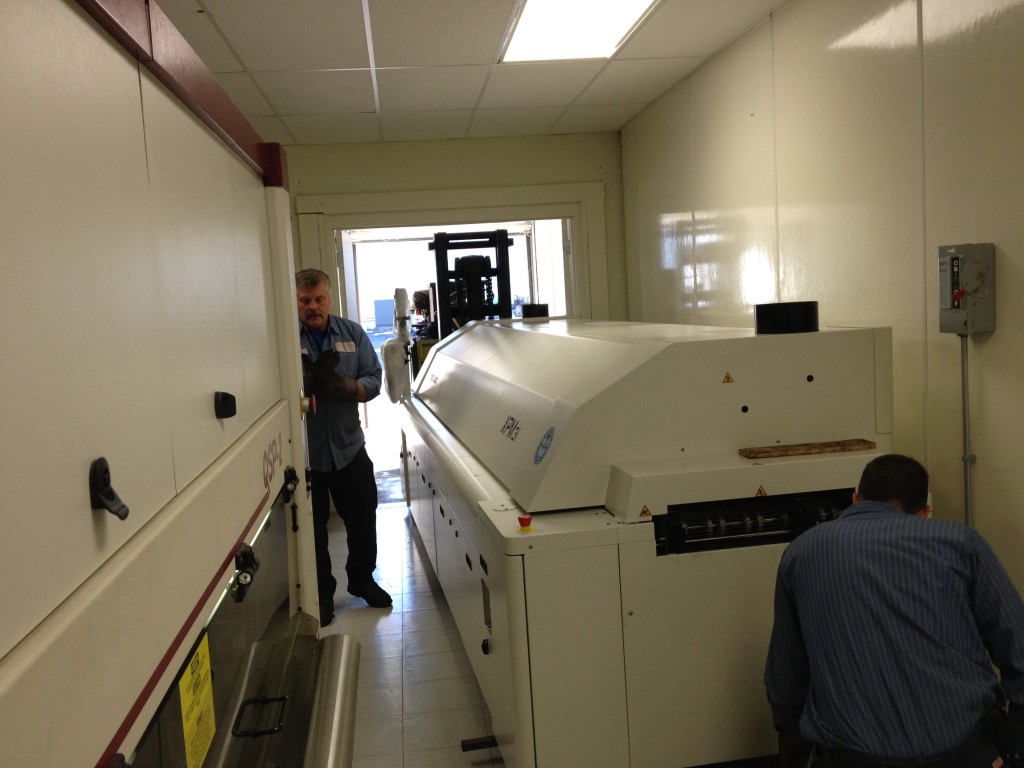
Before it arrived we had prepared our site to bring it in. This machine is so large that we had to clear out all sorts of areas to receive it properly without damaging our facility or the machine itself.
The rigging company did a great job. They were very careful about not damaging anything. As you can see in this picture, they had very little room to maneuver it. But with plenty of patience they got it in place just fine.
With our reflow oven in place, we were finally ready to begin processing boards real time. As fast as we can build them, this reflow oven can take them. On average it can spit out a board every 15-25 seconds, depending on the length of the board and the type of solder we're using. That's slightly better than one board every 8 minutes, don't you think?
The way the XPM3 works, and really most reflow soldering machines for that matter, is it has a conveyor belt that circuit boards rest on. This conveyor belt is constantly moving through a long heated chamber. The heat in this chamber comes from a number of different heating zones. Our particular unit has 8 heating zones. 8 on the top and 8 on the bottom. These zones can, but don't typically, get up to 350 degrees Celsius. Each of these zones is set to a specific temperature and the board is gradually brought to the point where all of the solder paste is melted and reflowed to the components. The last two zones of the machine are cooling zones that simply blow ambient air onto the circuit board to re-solidify the liquid solder.
One of the best parts about buying an XPM3 is that it comes with a piece of software called AutoSet. In a typical manufacturing environment, you would have a scrap board, fully populated and soldered, that you would run through your reflow oven with multiple thermocouples hooked up to it. These thermocouples would then feed information into a unit called a "profiler" and that profiler would collect and organize data coming from the thermocouples. After the board and the profiler exited the reflow oven, you would have to take the profiler out of a very hot insulated chamber and walk it over to your computer, plug it in, and pull the data out of it. Using software on your computer you would then analyze this data and determine what temperatures you should set each zone of your reflow oven at. You would then repeat this process 2 or more times until you finally have a stable profile that will give you a quality reflow as well as prevent damaging it or any of its components. Talk about time consuming. Not to mention expensive. Not every customer is so excited to give you a circuit board for you to destroy just so you can make sure you're building it right.
With AutoSet, you simply measure the length and width of the circuit board, place it on a small scale, and enter this information into the software on the computer of the reflow oven. You tell the software what type of solder paste your using and hit the go button. The computer crunches some numbers and a few seconds later, gives you a profile for that specific board that will be perfectly acceptable 9 times out of 10. So far, we have not run into that 1 out of 10. Everything we've used this for has worked great for us.
Needless to say, we have been very happy with our new reflow oven and look forward to many more years of quality service from it.
2011 In Review: Selective Soldering
Selective Soldering
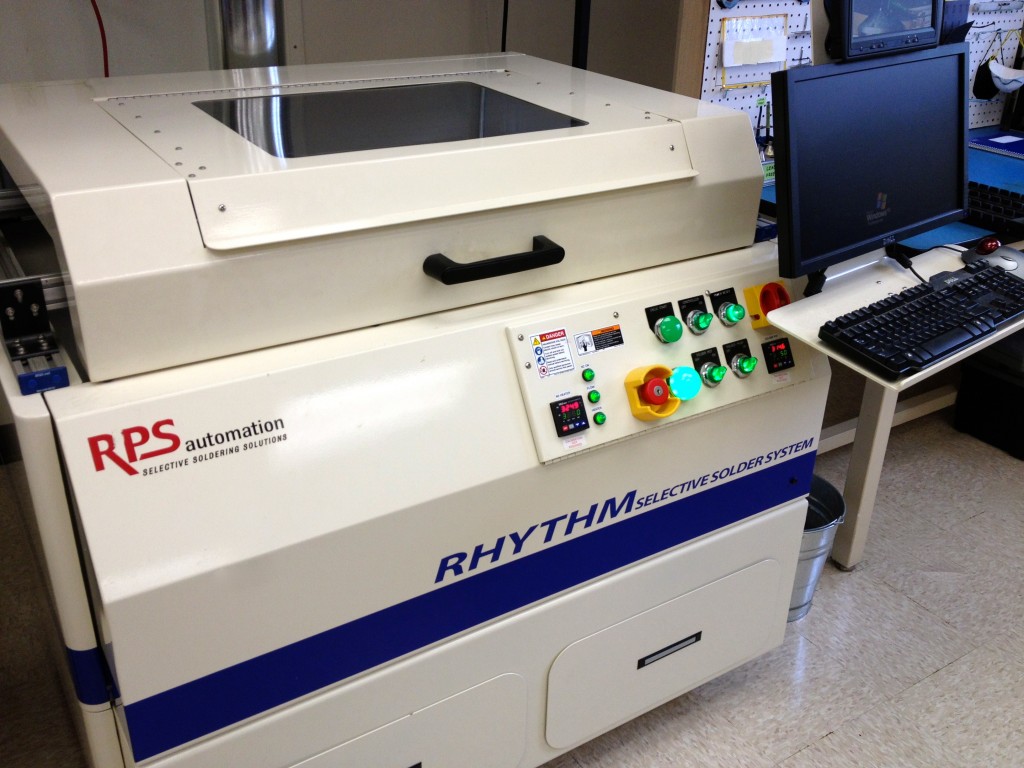
Early in April we identified that there was a serious need to get one of our machines operational. This was our RPS Automation Rhythm Selective Soldering system.
If you're not familiar with a selective soldering machine, it's basically a machine that creates a small fountain of molten solder that is controlled by an X,Y,Z robotic platform. This platform is then programmed using software, to move to very specific locations on the circuit board and solder the bottom side of the board. Here's a video of it in action.
It's a great machine but we had trouble getting it to work for our needs. It was not soldering our boards very well. It was leaving all sorts of solder bridges that had to be reworked and even missing a lot of solder joints. It was causing a lot of headaches. So something had to he done. A couple phone calls to RPS and we had one of their finest representatives (Adam Zinnecker) in our shop giving us a full 3 days of training, at no charge. He flew out from Spokane Washington and didn't seem to mind waking up at, what felt to him, 4AM.
We learned so much about the equipment as well as the process of selective soldering itself. Selective soldering is still very new in our industry and has a lot of uncharted waters. But after our training we were off and running. We learned all about how to care for the equipment. What sort of maintenance was essential and how to extend the life of wearable items. He went over dozens of techniques to help reduce defects and increase throughput. It was very comprehensive.
Thanks to Adam's help and a bunch of effort we now have probably over 50 unique assemblies programmed on our machine. We have easily run 10-20 thousand circuit boards all together. We have put her through the paces.
Along the way we recognized that our 4" mini wave was not going to be a good solution for us. Another quick couple of phone calls to RPS and we made an arrangement to send them back our 4" mini wave solder pot and receive a gently used lead-free soldering pot. It could not have come at a better time. We received it on a Tuesday morning, put it in the machine, filled it with solder, calibrated it, and ran about 20 assemblies for our customer who came to visit us that afternoon to see it in action. It was an unbelievable day and everything just fell into place for us.
What makes selective soldering particularly unique is that you don't have to worry what parts have already been assembled on the circuit board. Because the machine is programmed you can have it avoid coming into contact with components that would otherwise be damaged. So if you have a circuit board with very large connectors on both sides, no need to worry. Just program the machine to avoid those large connectors and just solder everything else. The following is a picture of an assembly that we make that has very large connectors on both sides. As you can see, there would be no way we could wave solder this circuit board. The only way you would ever have been able to assemble this circuit board before we bought this machine was by hand. It was very time consuming.
But with a selective soldering machine we can solder the large white connector and then go back and solder all of those other connectors on the opposite side. Notice there are a bunch of SMT parts on the side with the white connector too. All of those SMT parts would fall off the board if we tried to wave solder these.
The selective soldering machine has been a great success for us. We solder literally hundreds of circuit boards every day with it. The solder joints are far more consistent and repeatable than hand soldering. And the time it takes for us to solder each board has plummeted. Some products take far less than half the time they used to take us soldering them by hand. And it's a great fit for our continual flow manufacturing operation. More on that in a later post.
2011 In Review: Air Compressor
Wair compressore did a ton of research on the purchase of an air compressor. We had been using a very large reciprocating style air compressor
So we began doing a little research and discovered that there are at least two big players in the air compressor market. Ingersoll-Rand as well as Sullair. We contacted distributors for each manufacturer. Air Compressor Engineering (A.C.E.) out of Westfield, MA and A&M out of Uxbridge, MA. ACE carries Ingersoll-Rand and A&M carries Sullair. After doing a ton of research we found that both companies were going to fit the bill for us quite well. Their products were very similar and we had a difficult time finding much differentiation between either one. At the end of the day A&M had a slightly better price but Ingersoll-Rand's footprint was slightly smaller. The footprint was important to us because right now we have a very limited amount of floor space. We explained our predicament to the salesmen at both companies and unfortunately for A&M there wasn't much they could do about the footprint. But changing the price wasn't too difficult for ACE. So at the end of the day we ended up purchasing a brand new air compressor from ACE, made by Ingersoll-Rand. And let me tell you, this is one beautiful piece of equipment.
We ordered a 10 HP rotary screw air compressor. (Link to IR's product page). It comes mounted on top of an 80 gallon "receiver" (tank) and is enclosed in an acoustic enclosure. The machine is very quiet. You can easily and comfortably speak over the noise it makes when the door is closed (which should will always be closed). We did not purchase the variable speed version. The price of which was far too out of our price range. But the on-load/off-load is perfect for us. We went ahead and plumbed in our old air compressor as well. This way we have the extra storage space which improves the air compressor's efficiency as well as allows us to perform maintenance on the IR air compressor and continue our manufacturing operation by running our old reciprocating air compressor.
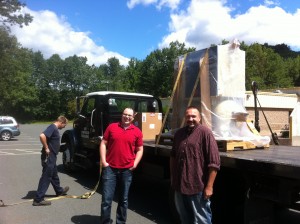
ACE did an excellent job of delivering the machine on time. It came on an open bed truck so that we could easily use a fork lift to get it unloaded. Here's a quick video I shot to remember that day.
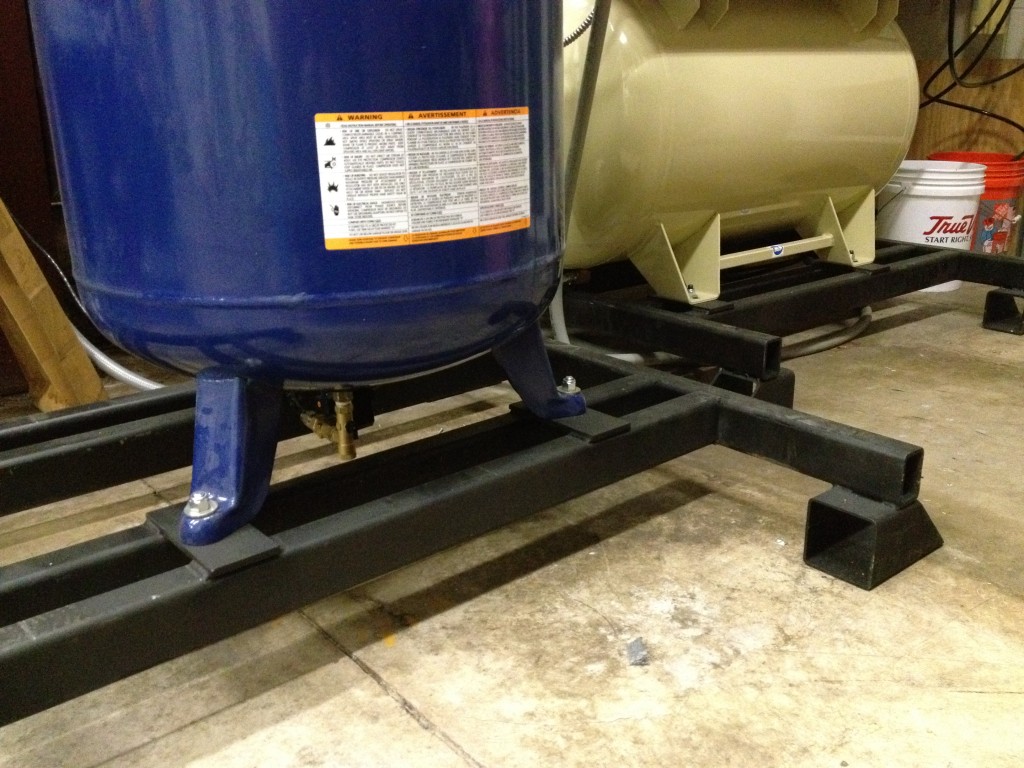
Our friends across the street welded up two beautiful stands for each air compressor so now we can easily use a pallet jack or fork lift to move the air compressors around. It's really handy.
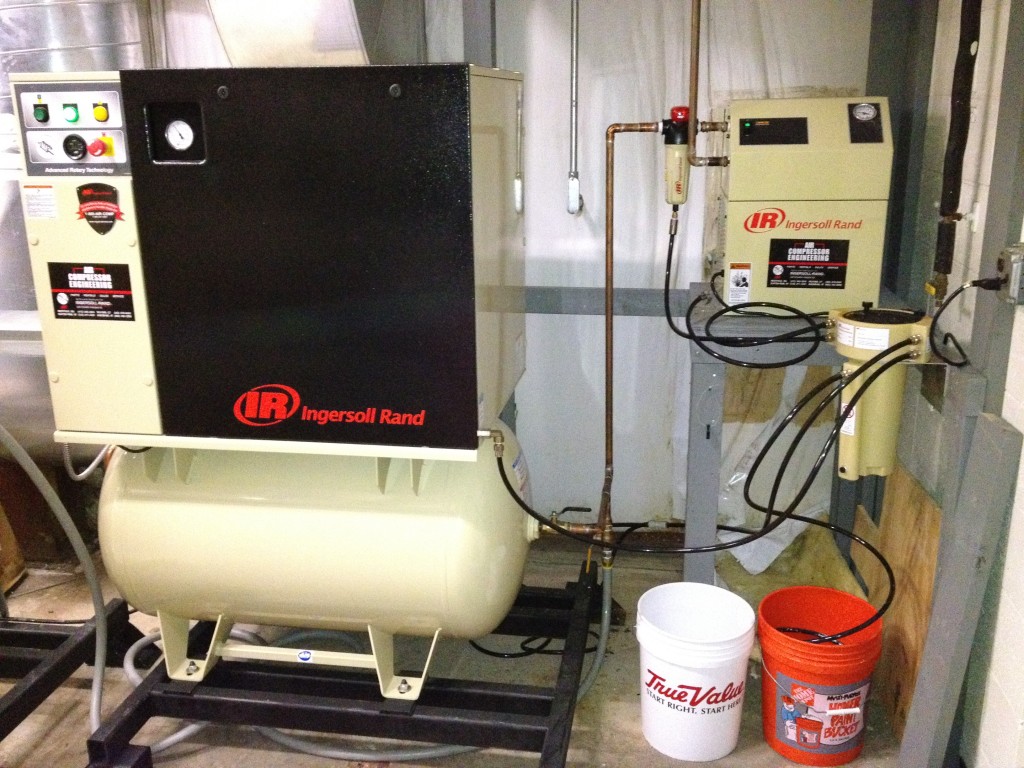
One of our goals with this new air compressor was to never worry about the quality of our air ever. So we made the investment in a very high quality inline filter and dryer. The dryer we purchased is basically an air conditioner that cools the compressed air down as it passes through which causes the air to condensate so that the dryer can collect the moisture and remove it before it gets to our equipment. We purchased a cycling dryer so that we could save energy. Otherwise the dryer would be running 24/7.
In order to reduce how much maintenance was required for this system we also decided to purchase electronic drain valves for each air compressor. These drains turn on for about 10 seconds every 45 minutes, expelling any water in the tank. There are a total of 5 drains in our system. One for each tank, one for the compressor itself, one for the air filter, and one for the dryer. Each drain is plumbed into something called a "Polysep". This is one sweet tool. Basically it uses centrifugal force and a very large filter to separate the oil from the water that gets expelled from the system. The water then fills up a small channel in the back with nothing but clean, sewer safe, water. From there we have a tube that runs down into a small 5 gallon bucket that we empty about once a week. It's a really nice setup.
All of the tubes you see are how the water gets passed from the system to the Polysep. The Polysep is that small cylinder to see hanging on the wall. The flexible gray air hose you see underneath our new air compressor is connected to our old air compressor. This way if we ever need to move our old air compressor we can just unhook the air hose and move it around, without interrupting production.
This was a huge improvement for WAi. We've been really pleased with IR as well as ACE. Now we never worry about our air quality or consumption. We have enough to last us a very long time.
Test
This is a test of the mobile Wordpress App. Please ignore. bold italics link
quote quote quote quote quote quote
The Chance of a Lifetime
 Seth Godin wrote a great post the other day. I liked this part.
A friend asked me the other day, "...given the sorry state of so much in the world, what's possible to look forward to?"The state isn't sorry. It's wide open.
Interest rates are super low, violence is close to an all time low, industries are being remade and there's more leverage for the insurgent outsider than ever before in history.
This got me thinking. So many people are blaming their problems on the economy. Meanwhile thousands of very successful companies were formed during seriously bad economic times.
We could have kept watching cable news and kept worrying and deciding not to get that loan or invest in that machine or hire that young energetic guy. But we would have missed huge opportunities. Instead we've kept plowing forward. We've made immense positive changes and have completely reinvented what kind of company WAi is. Later I will post a series of articles outlining all of the changes WAi has gone through for 2011 and how they have impacted us. We see the chance of a lifetime.
