This is just one article in a series of articles discussing tips and tricks for using a selective soldering machine. Here at Worthington Assembly Inc. we have a selective soldering machine manufactured by RPS Automation. Our particular model is a 2010 Rhythm model. These article are written by the same person who's used this machine every day for over a year. We do not own a wave soldering machine. We've never had a need for one. Most every circuit board we build has double sided surface mount and thru-hole, making wave soldering a non option. But sometimes we get circuit boards that are designed for wave soldering, so we have a technique for handling those.
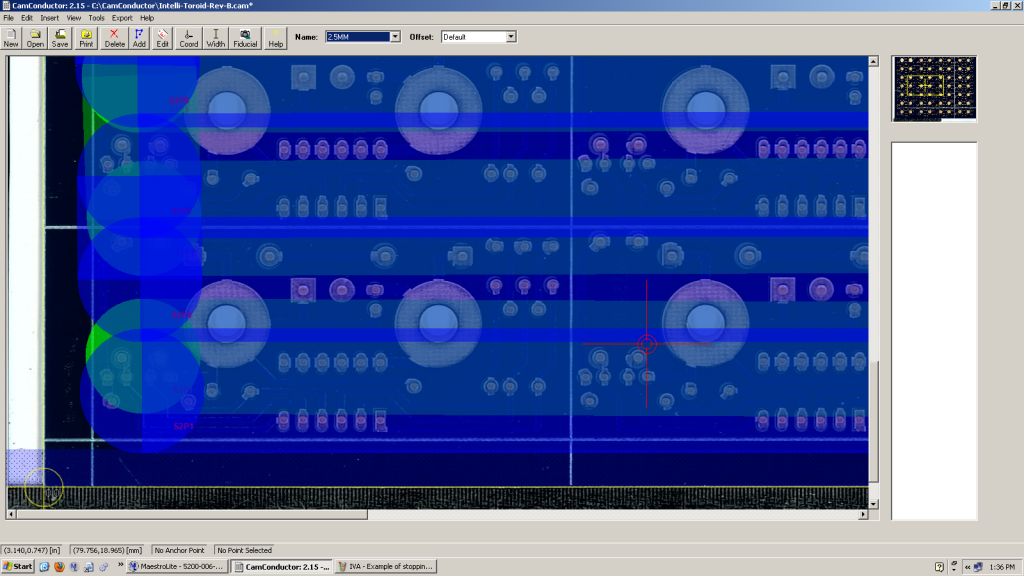
We use our largest nozzle, which has an inner diameter of 8mm and an outer diameter of about 21mm. When we write our program, we overlap the path the nozzle will travel as seen in the image below.
Click here for full size image
The reason we do this is because if we merely grazed the edge of the path we might get missed solder joints. This happens because the contact area, where the solder meets the circuit board, is not always consistent. It's affected by a number of things including your pump speed, the amount of solder in your solder pot, the flex in the board, etc (when a board is closer to the nozzle, the contact area gets much larger. Even a few tenths of a millimeter can make a big difference). Overlapping the nozzle enables us to be more flexible. We don't have to keep such a close eye on the pump speed, or the solder level. And as our board heats up and bows, we don't have to worry about whether or not it's going to touch every solder point we need it to.
Overlapping doesn't have to be used only when substituting for a wave soldering machine. It can be used for a number of different applications. Be careful though because sometimes overlapping on areas where pads are too close or leads are too long can cause bridging.
We hope this helps. Please feel free to give me a call or send me an email.

